Showing posts with label drill. Show all posts

Friday, June 27, 2014

Reaming Props The Fast Way

So if you're at all like me, you've probably bought some cheap props online and at some pointed needed to ream them out to make them fit on a multirotor or some such. So here's some of the approaches I've tried and the levels of success I've had with them. 

1. Drill: Don't do this. It seems like it would be perfect but the problem is that the tapered cutting edge of the drill grabs and pulls its self though the prop and will certainly not go through straight. I've done a few tests and even clamping the prop down doesn't help. If you can get a straight hole drilled with one of these you know something I don't. 


2. Prop Reamer: Right so this is what you're supposed to use. However I've bought a couple of cheap ones online and they just don't work. I couldn't ream out a cheese prop let alone a nylon or even carbon fiber one. 
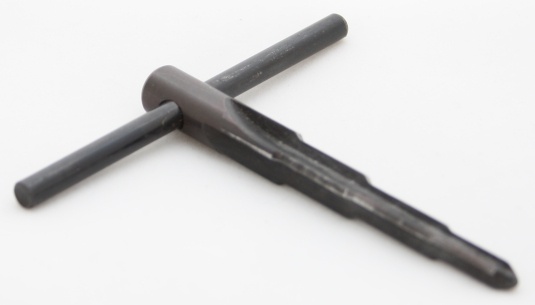

3. Step Drill: I found one of these down at my local hardware store and thought I've give it a try. Turns out, Its awesome! Because it doesn't have a tapered cutting edge it doesn't pull its self through the prop. You can simply bore it out all the care and attention you need to make sure you do it straight. Also because its being operated by a power drill and its really sharp it will ream out a prop made of pretty much anything really nice and fast. So it may not be what the pros recommend but its sure worked for me. 


Note: If you have any other ideas or experience put them in the comments and I'd be glad to include them in this list of prop reaming tools. 

Sunday, April 20, 2014

Lipo Conversions Part 1


If you're into RC at all you're mostly likely know what LiPo batteries are. If you're not have a look here

Having a whole load of these batteries in my garage I've discovered that you can do a whole lot more with them than power RC aircraft. 

So my first LiPo conversion project was to resurrect my trusty battery drill. Its a great drill however it suffers from the same problem that a lot of battery drills do in that if you don't use it all the time the batteries die eventually and also the batteries take a very long time to charge. So I converted mine to run on Lipos and now it not only charges much faster, but I can buy very cheap replacement batteries for it when ever I need to and charge it with my Lipo charger instead of the big bulky charger it came with. 

So here's how to do it. 

Step 1 - Battery Selection.
You'll need to open up the battery that comes out of the handle of your drill and have a look (or measure with a multimeter) at much much voltage the battery supplies. Then you can buy a lipo to match. In my case this was a four cell 1.3 amp hours battery by Turnigy. Its also Important to take into account what the maximum discharge rate that battery will be subjected to is and make sure you get a battery that can handle that. I'm not exactly sure what that is for my drill so i got this 45-90 C discharge batter from HobbyKing for $13.50. The final thing to consider is a battery that will fit in your drill's battery casing. Don't get one too big or it won't fit and you'll be up a certain creek. 

Step 2 - Solder up the connectors 
Once you've got your battery ready to go you'll need to solder the connectors from the battery casing to a plug that will match what ever kind of battery plug you use. I use deans so that what I've connected here. You can work out which is the positive and which is the negative terminal by looking at the old battery you've taken out and seeing how it was connected. 
 

Step 3 - Insert Battery
Once you've got your connectors soldered up you can put your battery in side, plug it in and put the whole thing back in the drill. One mod you could do which I didn't, was to solder another battery connectors outside your battery casing so you can charge it with out taking it out of its case. I simply unscrew the case and take the battery out when I want to charge it. I've actually got two so I just swap the battery over and put a new one in while I charge the flat one.