Friday, June 27, 2014

Reaming Props The Fast Way

So if you're at all like me, you've probably bought some cheap props online and at some pointed needed to ream them out to make them fit on a multirotor or some such. So here's some of the approaches I've tried and the levels of success I've had with them. 

1. Drill: Don't do this. It seems like it would be perfect but the problem is that the tapered cutting edge of the drill grabs and pulls its self though the prop and will certainly not go through straight. I've done a few tests and even clamping the prop down doesn't help. If you can get a straight hole drilled with one of these you know something I don't. 


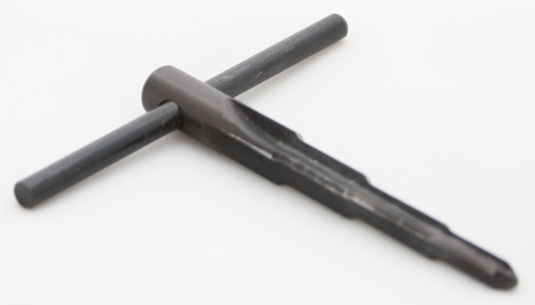
2. Prop Reamer: Right so this is what you're supposed to use. However I've bought a couple of cheap ones online and they just don't work. I couldn't ream out a cheese prop let alone a nylon or even carbon fiber one. 


3. Step Drill: I found one of these down at my local hardware store and thought I've give it a try. Turns out, Its awesome! Because it doesn't have a tapered cutting edge it doesn't pull its self through the prop. You can simply bore it out all the care and attention you need to make sure you do it straight. Also because its being operated by a power drill and its really sharp it will ream out a prop made of pretty much anything really nice and fast. So it may not be what the pros recommend but its sure worked for me. 


Note: If you have any other ideas or experience put them in the comments and I'd be glad to include them in this list of prop reaming tools. 

Thursday, June 26, 2014

FrSky Taranis Speaker Upgrade

At this point I think I've seen more of the inside of my Taranis than the outside. So here's another Taranis mod; not really a very important one but a simple one. The internal speaker of the Taranis isn't really the nicest thing to listen to so I thought I'd put a better one in. I found a little 1 W 8 ohm 36mm speaker on eBay for about $4 which is a bit bigger than the one in the from the factory but it will still fit with the help of a little hot glue. So here's the steps.

Step 1.
Open the Taranis up and unplug the stock speak and pull it out. Here's mine next to its replacement.


Step 2.
Now unsolder the connectors from the stock speaker and solder them onto the new one.


Step 3.
Trim off the little studs around the speaker mounting ring.


Step 4. Apply a little hot glue to mount the new speaker and plug it in.


Step 5.
Put the Taranis back together and fire it up!

Sunday, June 8, 2014

Lipo Conversion Part 2

So I had such great success turning my battery drill into a lipo powered device I thought I'd give something else a go.

I've got a headlight for my mountain bike which has a cree LED in it. Its fantastically bright but its hard to mount it on the handle bars and have it point where I want it to and also the cord is long and gets in the way and finally the battery pack is big and bulky and takes ages to charge. Looks like a good time to break out the lipos and see if I can sold all those problems at once.


Step 1.
The light in its unmodified state.


Step 2.
Cut off the normal plug from the light and solder on a plug that matches the plugs on your lips. I'm using deans plugs here. I chose this 2S 1300mah battery because the voltage the light was supposed to work with (according to the writing on the battery pack)  was was 7V and a 2S is close enough.


Step 3.
Cut and glue a mountain bracket onto your helmet. I did this because mounting it here made a lot more sense to me that mounting it on my handle bars. this way it pointed where ever I wanted it to.


Step 4.
On the back I glued a little bit of foam as padding and a Velcro strap to hold the battery in place and to offset the weight at the front on the helmet.


Step 5.
All ready for riding at night! It charges faster and is way more useful than the original set up. Plus while I was at it I removed the little green LED inside the on button of the light to prevent battery drain when it's not actually turned on. The other good thing about this set up is I can use my lipo checker to see how much charge is left in my battery before using the helmet so I know I've got enough power to make it through the ride. I've also discovered that 3S batteries work with this particular light.

FrSky Taranis Antenna Upgrade Part 2

Well it seems that I am unable to stop modifying my FrSky Taranis so here's the next step.

Firstly I do not take credit for the design of this antenna. That came from the great IBCray and his tutorial for the calculations, theory and measurements can be found here. So I'm not going to go over those again. This is just my build log and application of his design. So that being said lets get started.

Things you'll need.

For the antenna:
1. A small coax cable
2. Copper or steel wire, about 14 AWG
3. Metallic plate
4. Two Nylon bolts
5. Plastic container (optional as this is just the cover)

For the antenna mounting (this is just my solution but many others would work as well):
1. 12mm x 12mm square wooden dowel.
2. Two M3 bolts (atleast 30mm)
3. Heat shrink


Other:
1. Heat shrink
2. Hot glue
3. Solder


Lets get to the modding......


Step 1.
Cut the backing plate and the wire. I used G10 board for the reflector plate.


Step 2.
Start bending the wire at the section lengths for a 2.4 Ghz (see the IBCrazy thread for the calculations to get the dimensions for your frequency)


Step 3.
The reflector plate and the resonator.


Step 4.
Drill a hole in reflector for the coax cable and also mount the nylon bolts to hold the resonator.


Step 5.
Strip the coax cable back and solder the shielding to the reflector.


Step 6.
Solder the resonator to the coax cable and glue it to the nylon bolts


Step 7.
Glue the coax cable and nylon bolts to the back of the reflector and glue the plastic container to the front of the antenna.


Step 8.
You'll need to get the coax cable into the Taranis so instead of drilling into it I ran it though the hole in the ORX module left when I did the antenna mod on it.


Step 9.
New antenna connected to Taranis.


Step 10.
Solder new coax cable to the Taranis module board where the other antenna was connected.


Step 11.
Antenna ready to be mounted.


Step 12.
Cut four sections of the dowel about the length of antenna. Doesn't matter if they are a bit shorter.


Step 13.
Clamp them together and drill a hole where they meet at the top about 4mm in diameter.


Step 14.
Take the handle off the Taranis and put some heat shrink over it to give the clamp more grip.


Step 15.
Drill mounting holes in the dowels just bellow the main semi holes.


Step 16.
Screw the mounts together with the M3 bolts and clamp them to the handle of the Taranis.


Step 17.
Glue the new antenna to the mounts.


Step 18.
All Done!


Note: this reduced my SWR reading down to 16. This is probably fine but I read that to get it even lower you need to make sure that when you're soldering the coax cable to the board you want to expose a very very small amount of the core and make it as close as possible to the soldered shielding.

Friday, June 6, 2014

FrSky Taranis Antenna and Sliders Upgrade Part 1

Well if you've read previous articles on this blog you'll know that I can't seem to stop modding my FrSky Taranis. It really seems to lend its self to modification. I've got some more planed as well.

Enough of that though, here's how to upgrade the main antenna of the Taranis and also the sliders. You might want to upgrade the sliders if you bought one before about February in 2014. Until that point they were shipping them with really cheap and nasty feeling sliders on the sides but fortunately you can buy the new sliders from places like Aloft Hobbies pretty cheaply.

Step 1. Things you'll need.
1. A pair of new sliders
2. A 5dB Omni Direction Antenna or A 7dB Patch Antenna
3. A coax cable (I would order this longer one because I ended up cutting the shower one too short and having to use another cable I had lying arund


Step 2. 
Open up the Taranis by removing the screws in the back and take out the sliders and switches at the top left and right. Be careful unpluging these from the main board as they are quite tight. I used a knife to get in and loosen the catches. 


Step 3.
Remove the hot glue blob over the soldered joint with a knife.Mine came off rater worryingly easy.  


Step 4.
Unsolder the coax cable for the antenna that's already there and then remove the main antenna. This will just slide up the top of the Taranis case as long as you use some pliers to squeeze the base of it so the little lugs come free.


Step 5.
Clean up the joint where the cox cable will be soldered on and add a little solder to the ground plates which are the two larger joints beside the little one in the middle which is the what the core wire will be attached to.


Step 6.
Get your coax cable ready. I cut off the little connector because I really don't think i'll be needing to change the connector any time soon so I just prepared it for soldering by feeling back the metallic shielding on the outside and making it into two wound strands which I've covered in solder as well as a little on the core strands to make them easier to connect to the board. 


Step 7.

Hot glue the coax cable into the hole where the old antenna came out of. I put a little bit of scrap wood underneath the hole to stop the glue from running down into the Taranis body


Step 8.
The coax cable hot gluded in place. 


Step 9.
Solder the outer shield joints to one or both of the outside connectors on the board and solder the core wire to the active connector on the board (the one in the middle)


Step 10.
Place a bit of hot glue (and do a better job than they did at the factory) on the joint for the coax cable.


Step 11.
You'll need to take the switches out to remove their wires and plug into the new ones which are attached to the new sliders. 


Step 12.
Put the new sliders back into the case, put the switches back in (make sure you didn't turn them around or put the back in the wrong side) and you're done. :)

Some notes:
One thing which I'm still investigating and testing is that SWR values with the new antennas are a bit higher than they were with the original stock one. I've read on the OpenTx website that this isn't a problem as long as it doesn't go about 50, however to my mind its still indicative of an imperfection somewhere so I shall keep investigating and make some more posts when I work it out.